Fabulous for gifts, for the kids (if bathtime novelty has finally worn off) or just for yourself. Adding essential oils, salts and butters can do wonders for your body and mind, adding a touch of healing luxury to your bath. Or if you prefer, you can use colours, glitters and invigorating scents to make your tub soak a little extra fun.
Bath bombs are notoriously difficult to make. Often, when mixing ingredients they fizz prematurely and you’re left with a non-foaming block of powder (not ideal). However, i’ve tried and tested a number of bath bomb recipes and have now refined my method and ingredients so that the process is super easy. Ideal for beginners and MUCH cheaper than purchasing from Lush, this fool-proof recipe will get you hooked and leave your skin feeling SUPER smooth and moisturised! Let’s get started 😉
What you’ll need
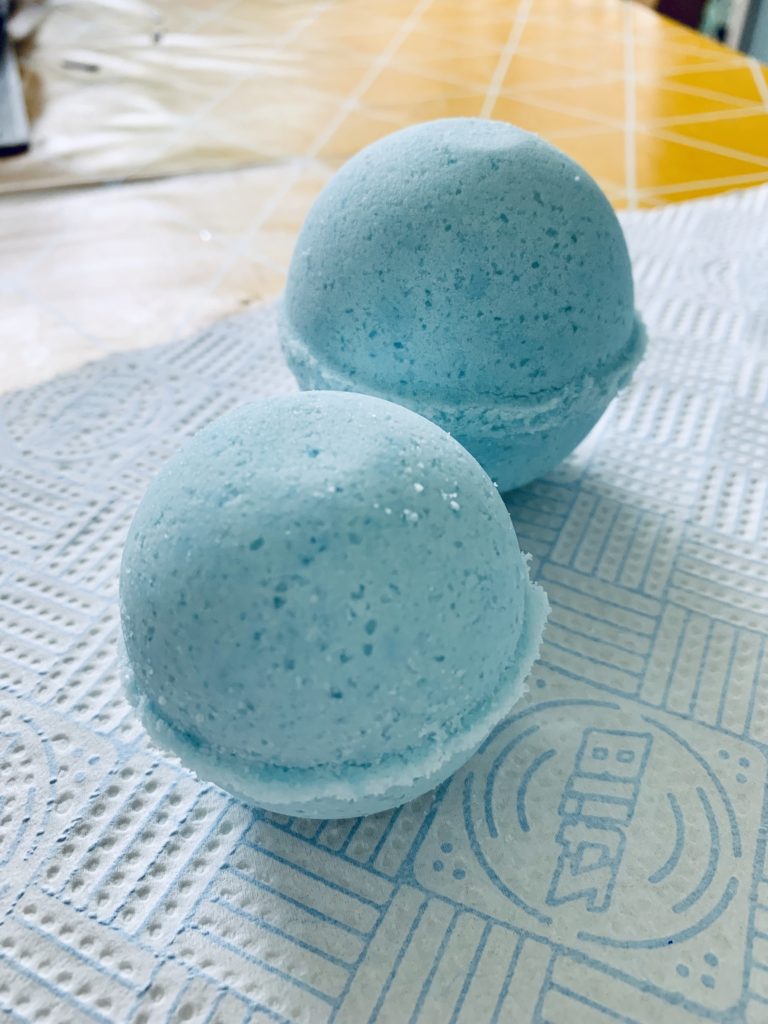
Makes approx. 4 medium bath bombs
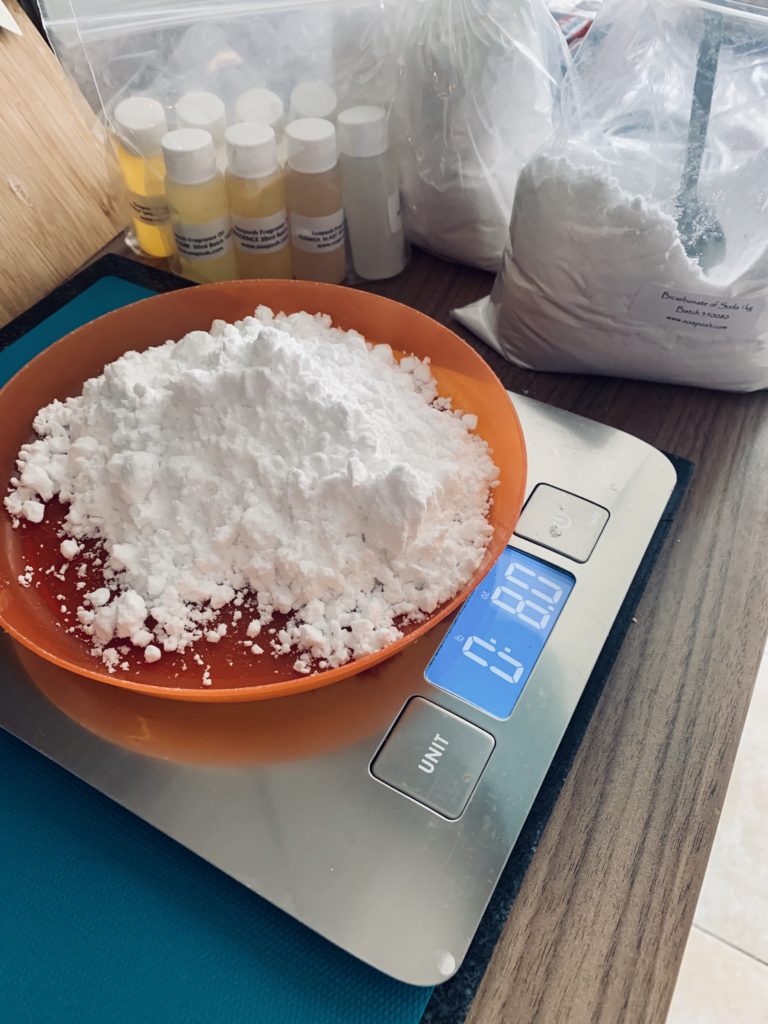
Dry ingredients
- 8oz bicarbonate of soda
- 4oz cornstarch
- 4oz citric acid
- 4oz epsom salts
‘Wet’ ingredients
- 3tbsp raw shea butter
- 2tsp fragrance or essential oils
- 1tsp oil (coconut or extra virgin olive oil)
- 4tsp food colouring
- 1tsp biodegradable glitter (optional)
You’ll also need
- Metal bath bomb moulds
- Large mixing bowl
- Small bowl
- Weighing scales
- Cling film or an airtight container
Method
- Mix the dry ingredients well in a mixing bowl and set aside.
- Melt the shea butter in the small bowl microwave for one minute, or until melted.
- Add the ‘wet’ ingredients to the small bowl and mix well.
- Add the wet mixture to the dry mixture. Do this slowly one teaspoon at a time while stirring and mixing continuously. This should take you around 10 minutes and will result in a slightly wet sand consistency, which just about holds together when you press it into a ball.. If you see or hear your mixture start to fizz, stop adding the wet ingredients and move on to the next step.
- Fill the metal mould halves by pressing the mixture into them, leaving them slightly overflowing.
- Push the filled mould halves firmly together and leave for 10 minutes.
- Remove the bath bombs from the moulds slowly, gently twisting each half of the moulds in turn to release them.
- Leave to air-dry on tissue or kitchen towel for 24 hours and then store in clingfilm or an airtight container. Done!
Tips
- These are fun to make with children and they will love the fizzy fun at bath time! Press a plastic toy into the centre of your bath bombs for a cool surprise! Lego characters are a popular option in our household 🙂
- Mix in dried flowers for stunning gifts
- Do two batches with different colours and use some from each when moulding for eye-catching bath bomb designs.
- Not sure what scents to use? Try these fragrance oil multi packs.
How did you find this recipe? Let us hear your thoughts in the comments below!
Hi, sorry if this sounds strange. Am I able to add clay and almond oil instead of coconut oil as-well as the ingredient you have listed? If so how do I know what ratio to use
I’m not sure about clay, but you can replace the coconut with almond no problem 🙂